Configuration
Configure EOS Integration Kit with your Epic Online Services credentials
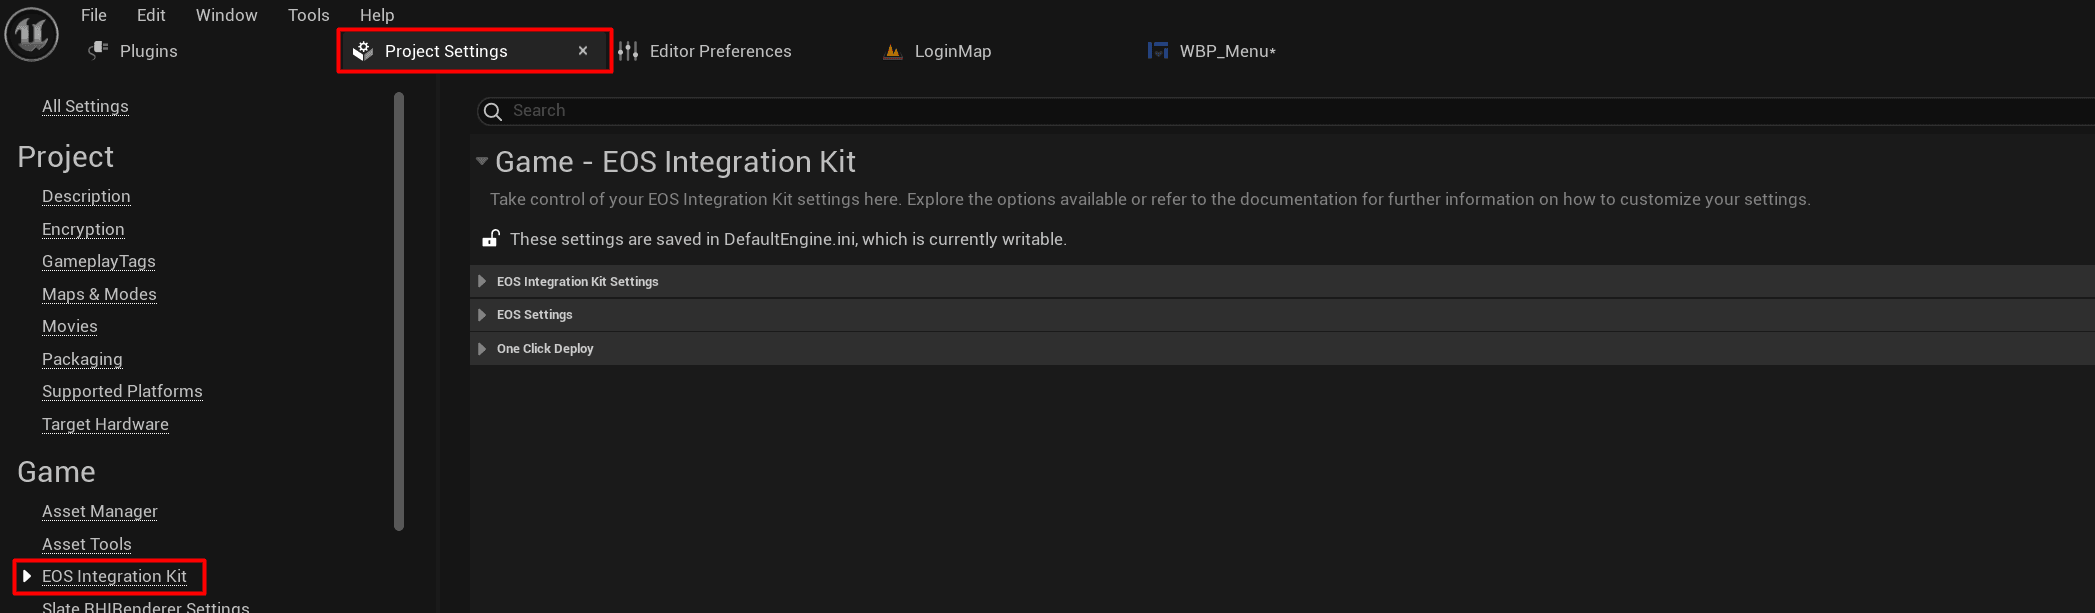
Open Plugin Settings
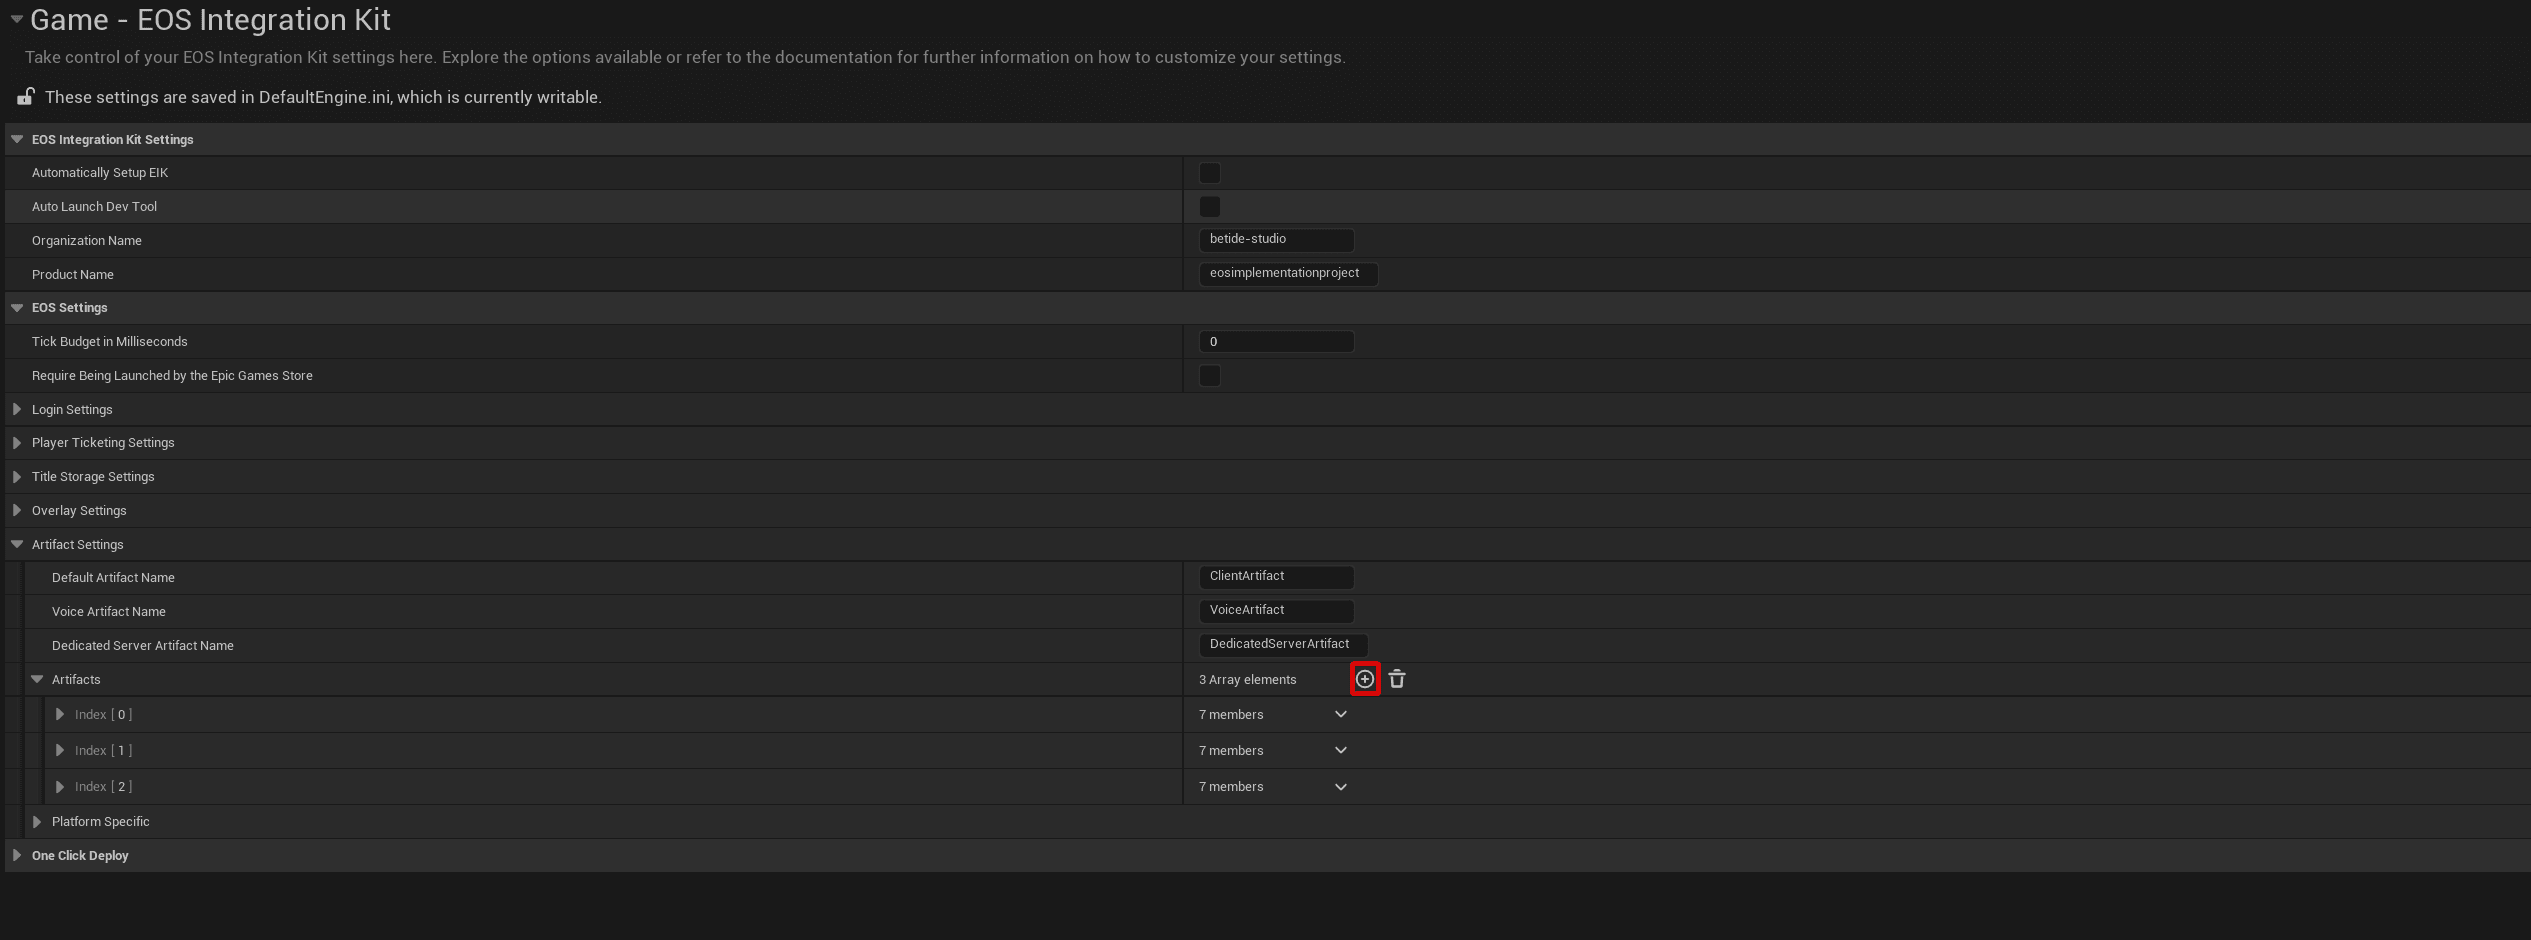
Go to Project Settings → Game → EOS Integration Kit to access the plugin settings.
Automatic Setup (Recommended)
Enable Automatically setup EIK to let the plugin configure everything for you. This handles all the DefaultEngine.ini settings automatically.

EIK now supports both Online Subsystem (OSS v1) and the new Online Services (OSS v2). The automatic setup configures both for maximum compatibility.
Configure Artifacts
Artifacts contain your EOS credentials. You need at least one artifact configured.
Get Your Credentials
-
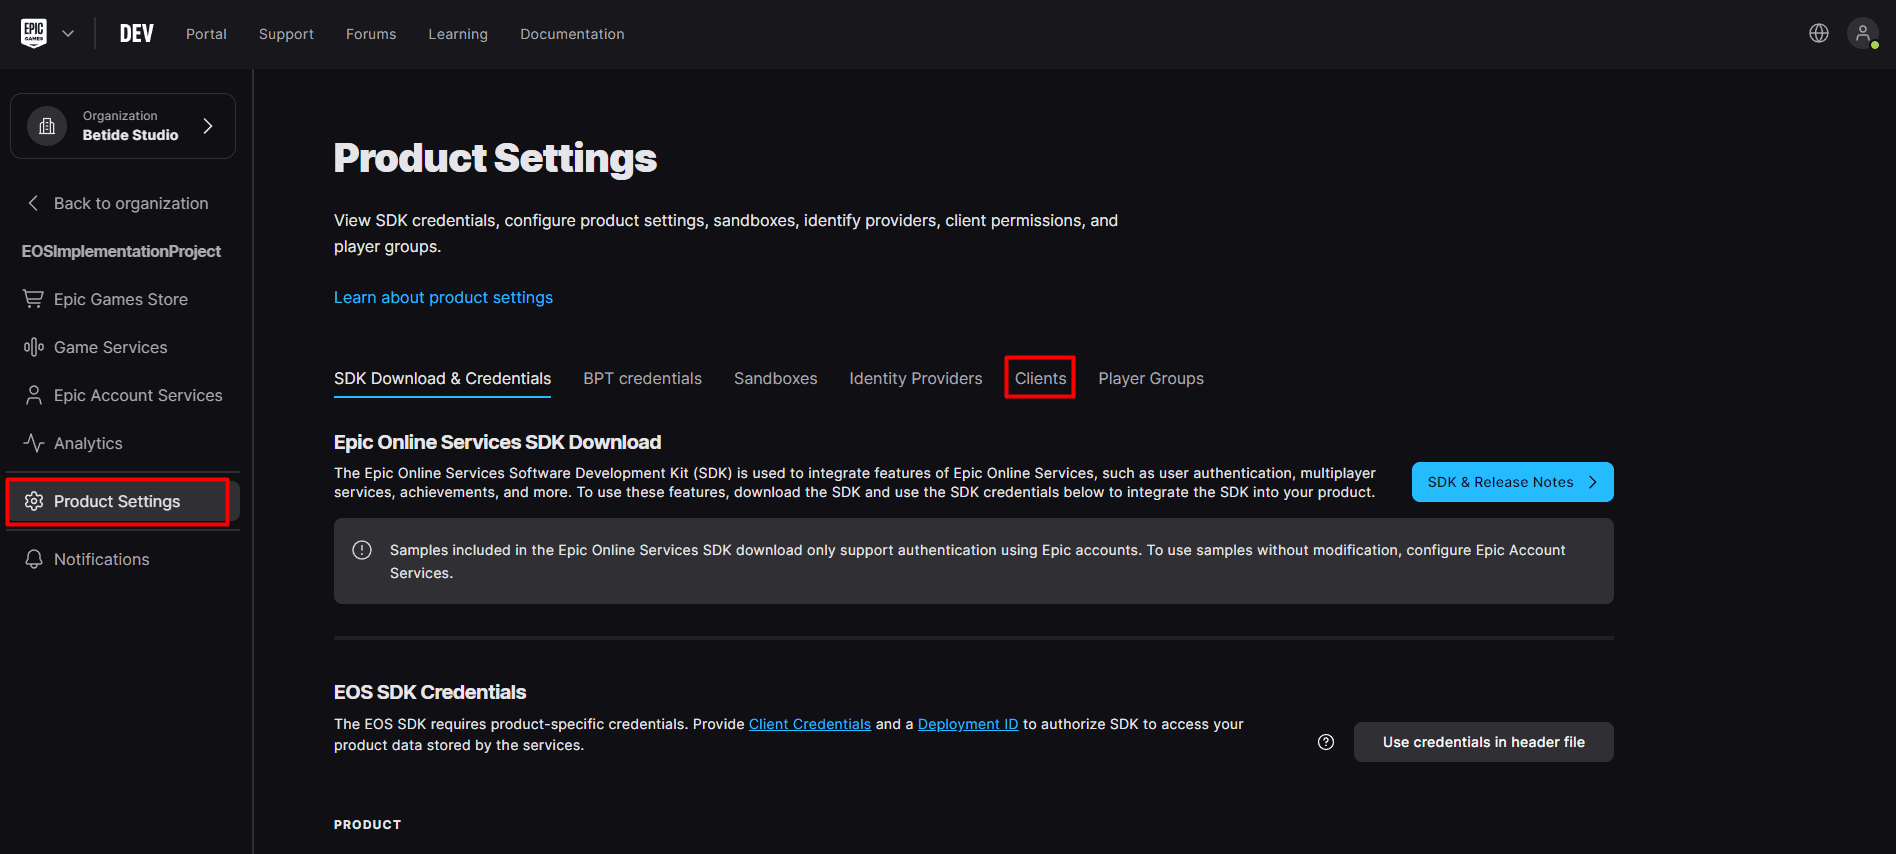
Go to the Epic Games Developer Portal and sign in.
-
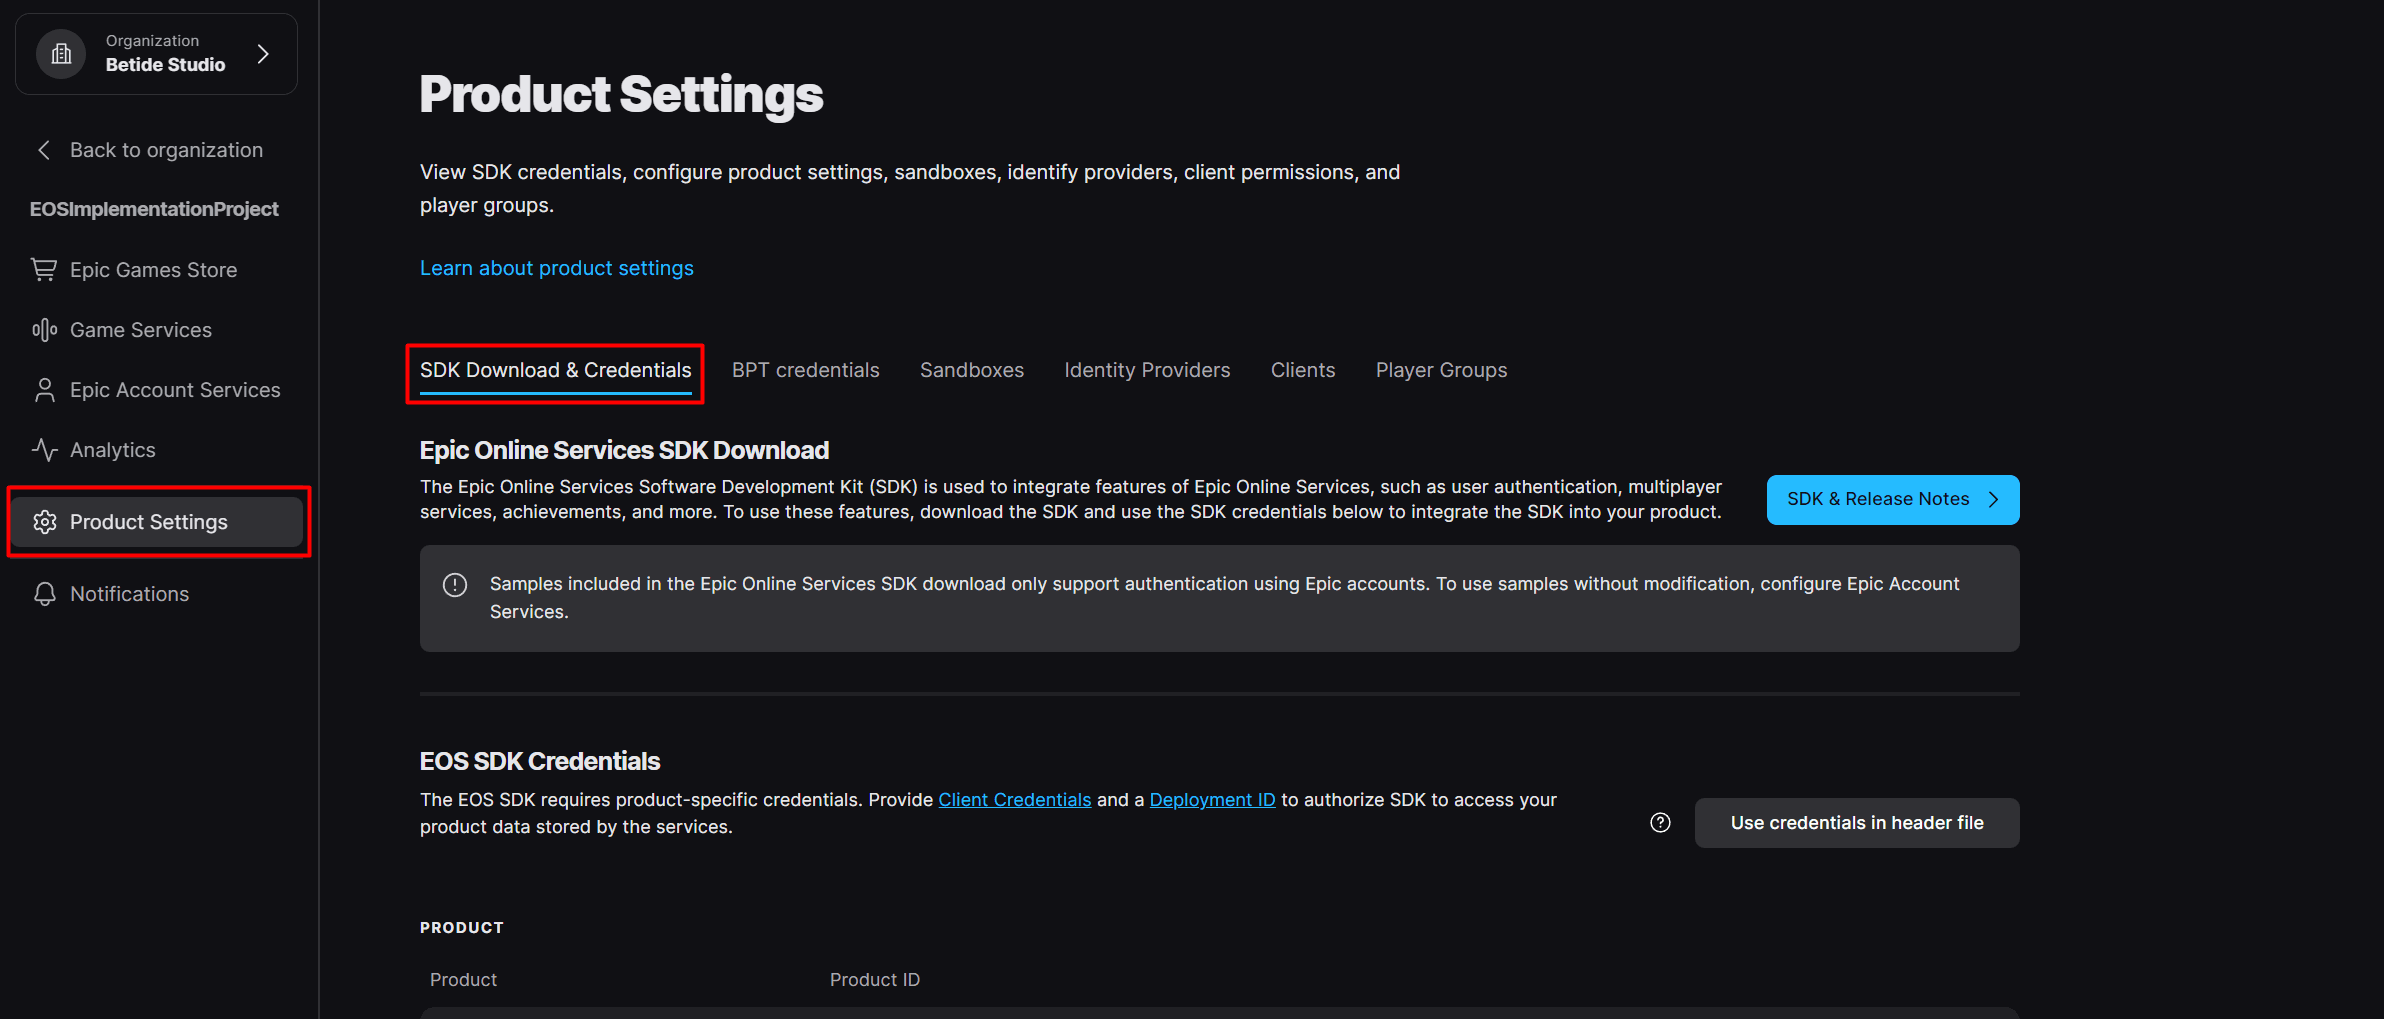
Select your product (or create one), then go to Product Settings → Clients.
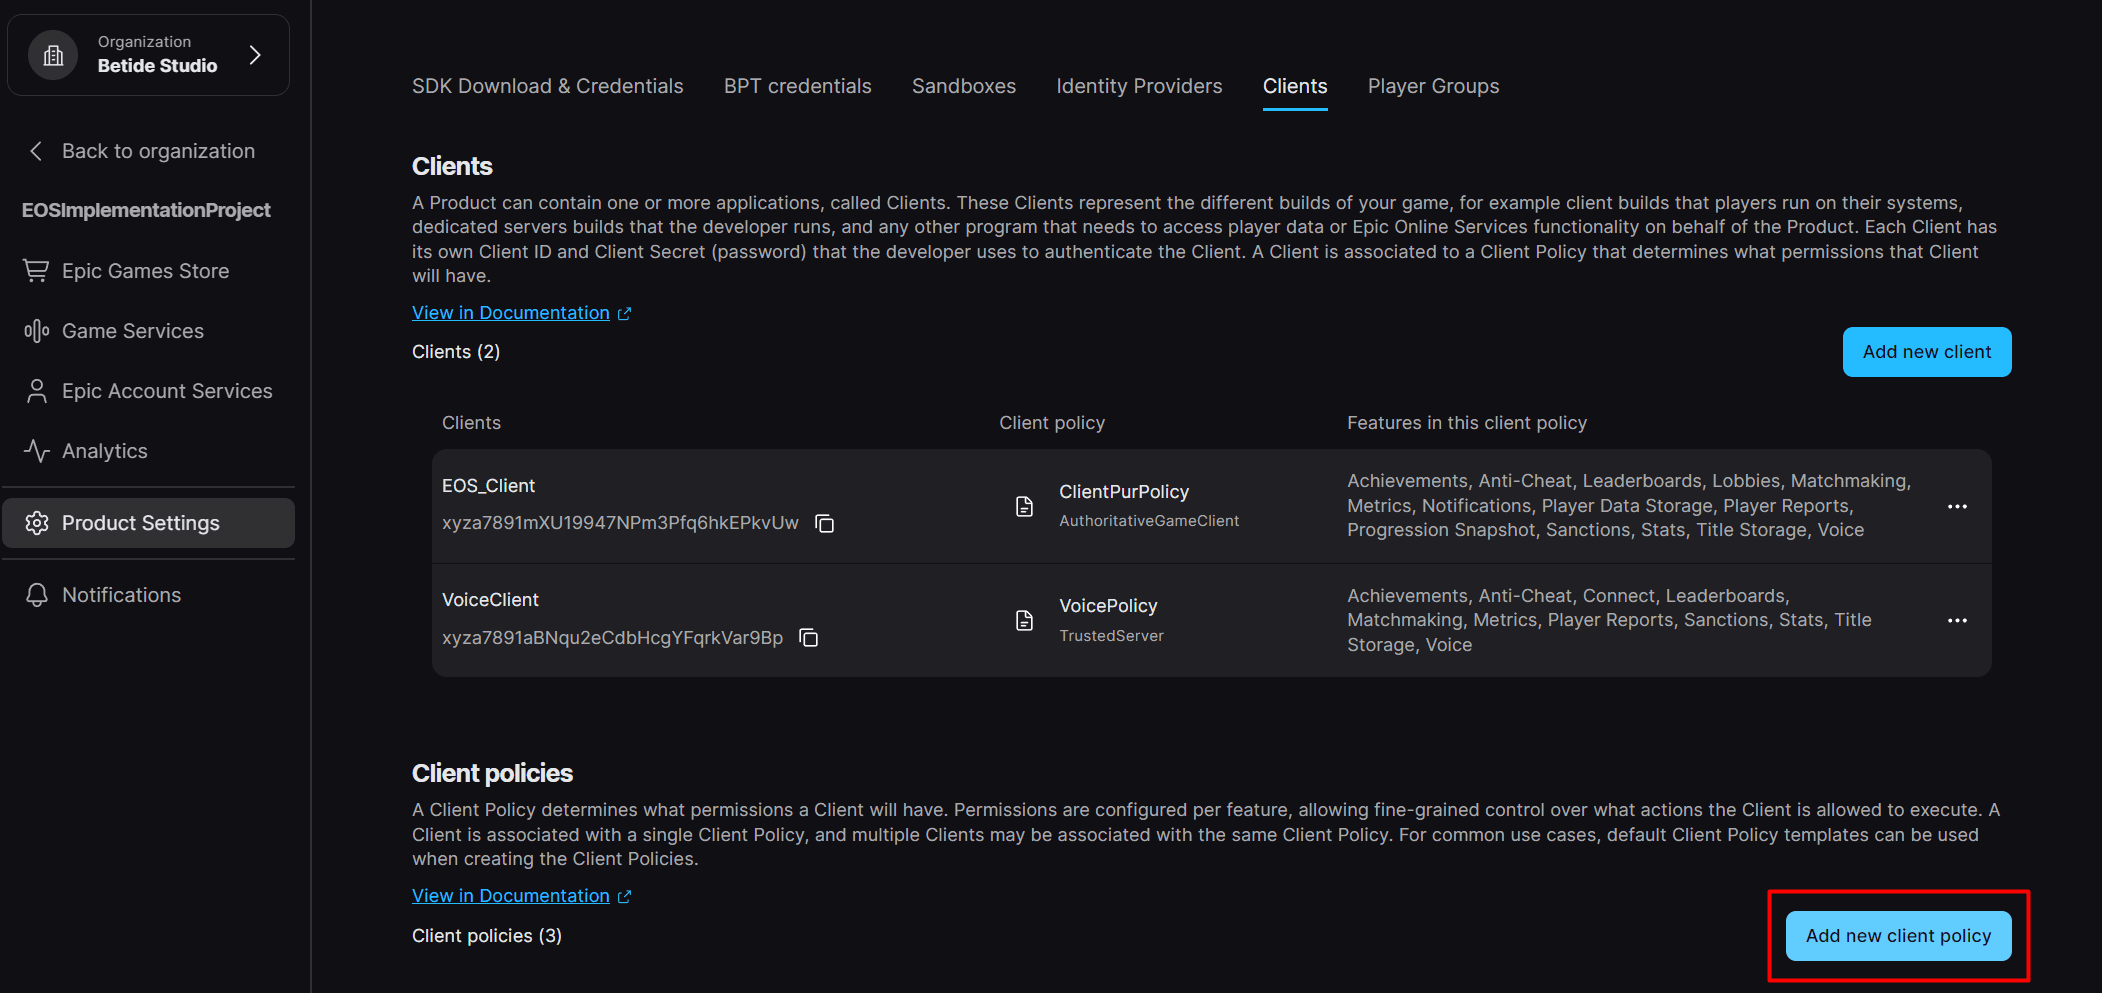
- Create a new Client Policy with type Peer2Peer (or custom if you need specific features).
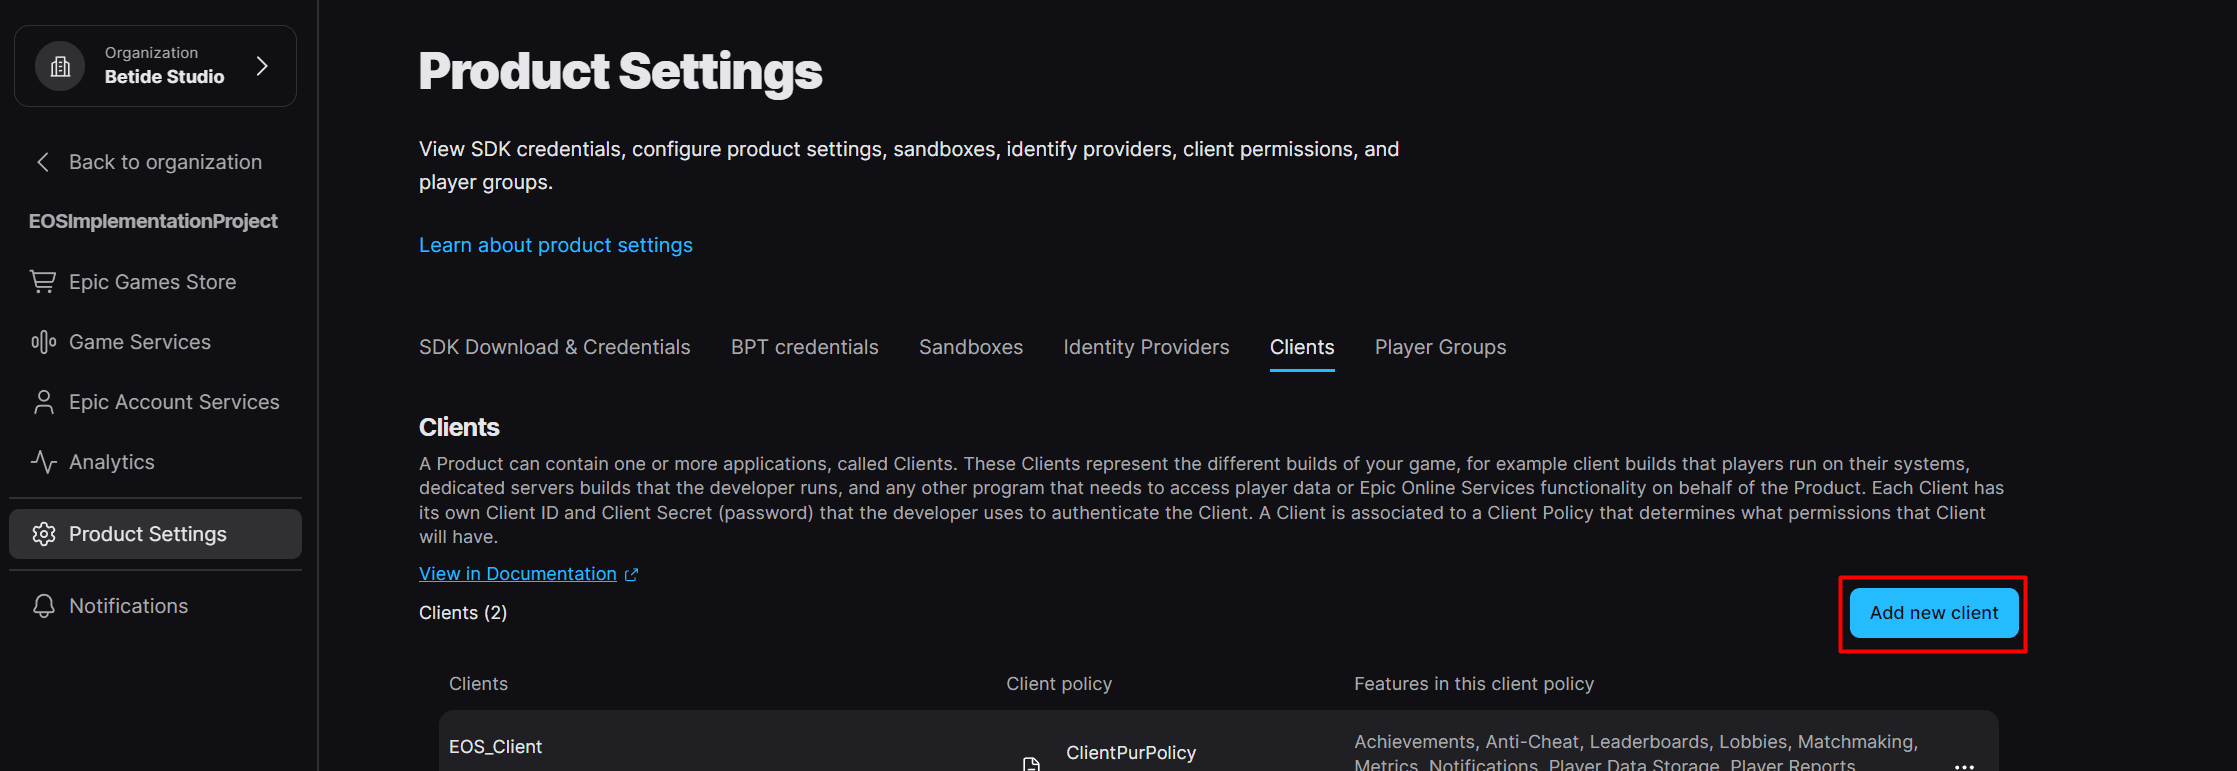
- Create a new Client using the policy you just created.
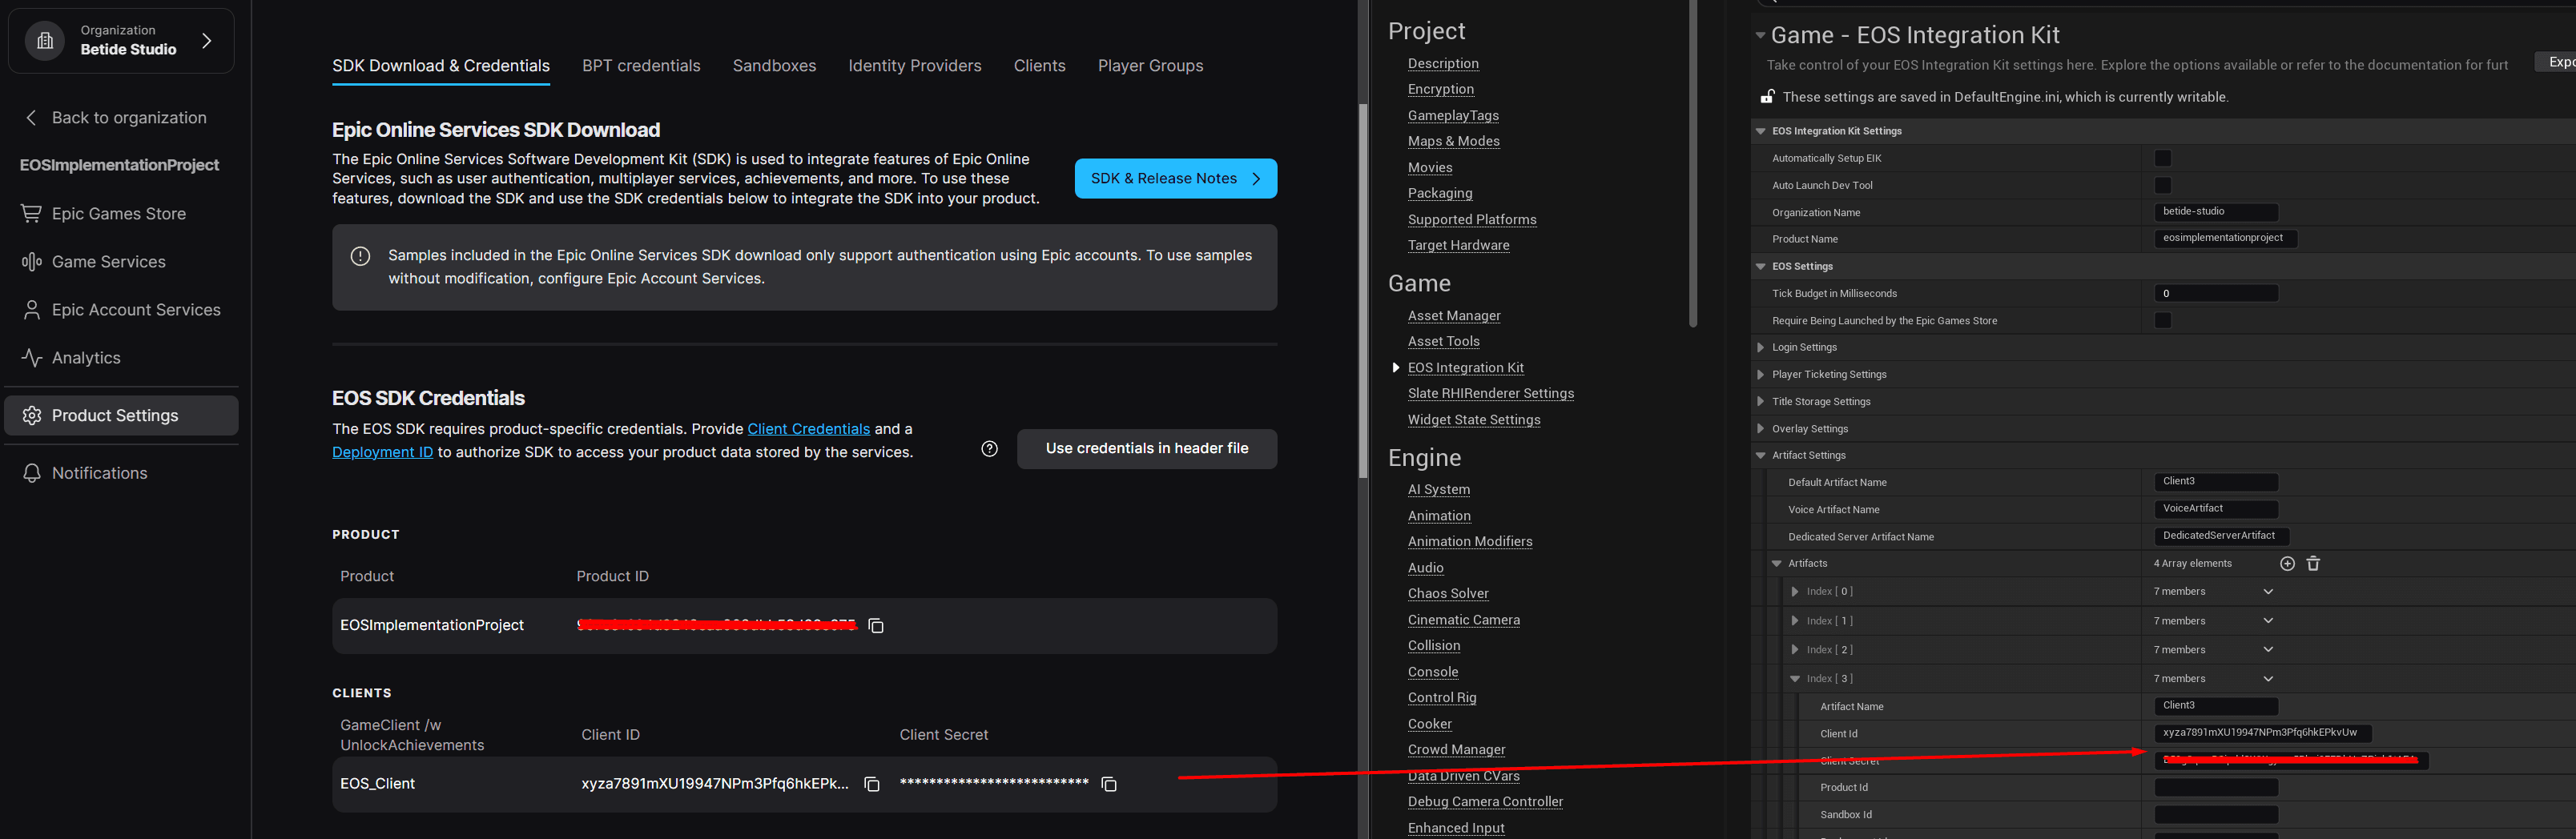
- Go to SDK Download & Credentials to find your credentials.
Add Artifact in Plugin Settings
- Click the + button under Artifacts to add a new artifact.
- Fill in the credentials from the Developer Portal:
| Field | Description |
|---|---|
| Artifact Name | A name for this configuration (e.g., "Development") |
| Client ID | From SDK Credentials |
| Client Secret | From SDK Credentials |
| Product ID | From SDK Credentials |
| Sandbox ID | From SDK Credentials (Dev, Stage, or Live) |
| Deployment ID | From SDK Credentials |
- Set the Default Artifact field to match your artifact name.
The Default Artifact field must match one of your artifact names exactly.
- Restart the editor for changes to take effect.
Manual Configuration (Optional)
If you prefer manual setup, add this to your Config/DefaultEngine.ini:
[OnlineServices]
DefaultServices=Epic

[/Script/Engine.OnlineEngineInterface]
ClassName=/Script/OnlineSubsystemUtils.OnlineServicesEngineInterfaceImpl

[/Script/Engine.Engine]
!NetDriverDefinitions=ClearArray
+NetDriverDefinitions=(DefName="GameNetDriver",DriverClassName="/Script/OnlineSubsystemEIK.NetDriverEIK",DriverClassNameFallback="OnlineSubsystemUtils.IpNetDriver")
+NetDriverDefinitions=(DefName="BeaconNetDriver",DriverClassName="/Script/OnlineSubsystemEIK.NetDriverEIK",DriverClassNameFallback="OnlineSubsystemUtils.IpNetDriver")

[/Script/Engine.GameEngine]
!NetDriverDefinitions=ClearArray
+NetDriverDefinitions=(DefName="GameNetDriver",DriverClassName="/Script/OnlineSubsystemEIK.NetDriverEIK",DriverClassNameFallback="OnlineSubsystemUtils.IpNetDriver")
+NetDriverDefinitions=(DefName="BeaconNetDriver",DriverClassName="/Script/OnlineSubsystemEIK.NetDriverEIK",DriverClassNameFallback="OnlineSubsystemUtils.IpNetDriver")
[OnlineSubsystem]
DefaultPlatformService=EIK
[OnlineSubsystemEIK]
bEnabled=true
[/Script/Engine.Engine]
!NetDriverDefinitions=ClearArray
+NetDriverDefinitions=(DefName="GameNetDriver",DriverClassName="/Script/OnlineSubsystemEIK.NetDriverEIK",DriverClassNameFallback="OnlineSubsystemUtils.IpNetDriver")
+NetDriverDefinitions=(DefName="BeaconNetDriver",DriverClassName="/Script/OnlineSubsystemEIK.NetDriverEIK",DriverClassNameFallback="OnlineSubsystemUtils.IpNetDriver")
[/Script/Engine.GameEngine]
!NetDriverDefinitions=ClearArray
+NetDriverDefinitions=(DefName="GameNetDriver",DriverClassName="/Script/OnlineSubsystemEIK.NetDriverEIK",DriverClassNameFallback="OnlineSubsystemUtils.IpNetDriver")
+NetDriverDefinitions=(DefName="BeaconNetDriver",DriverClassName="/Script/OnlineSubsystemEIK.NetDriverEIK",DriverClassNameFallback="OnlineSubsystemUtils.IpNetDriver")Next Steps
You're all set! Head to Quick Start to authenticate your first player.